

Expenses Manager
Expenses Manager is an app designed to record and track all of your organization’s expenses in an organized, centralized way. It lets you record payroll expenses, purchases, and utility bills from a single place, with the ability to review, track, and easily verify the status of every entry.
Why use Expenses Manager?
Recording all of the organization’s expenses in one place, with nothing scattered.
Easily tracking the status of every entry (draft or executed).
Knowing who created each entry, who executed it, and the execution date.
Reviewing total expenses by type (payroll — purchases — utilities).
How to access the app
From the system’s home page, click the “Expenses Manager” icon to open the app directly.
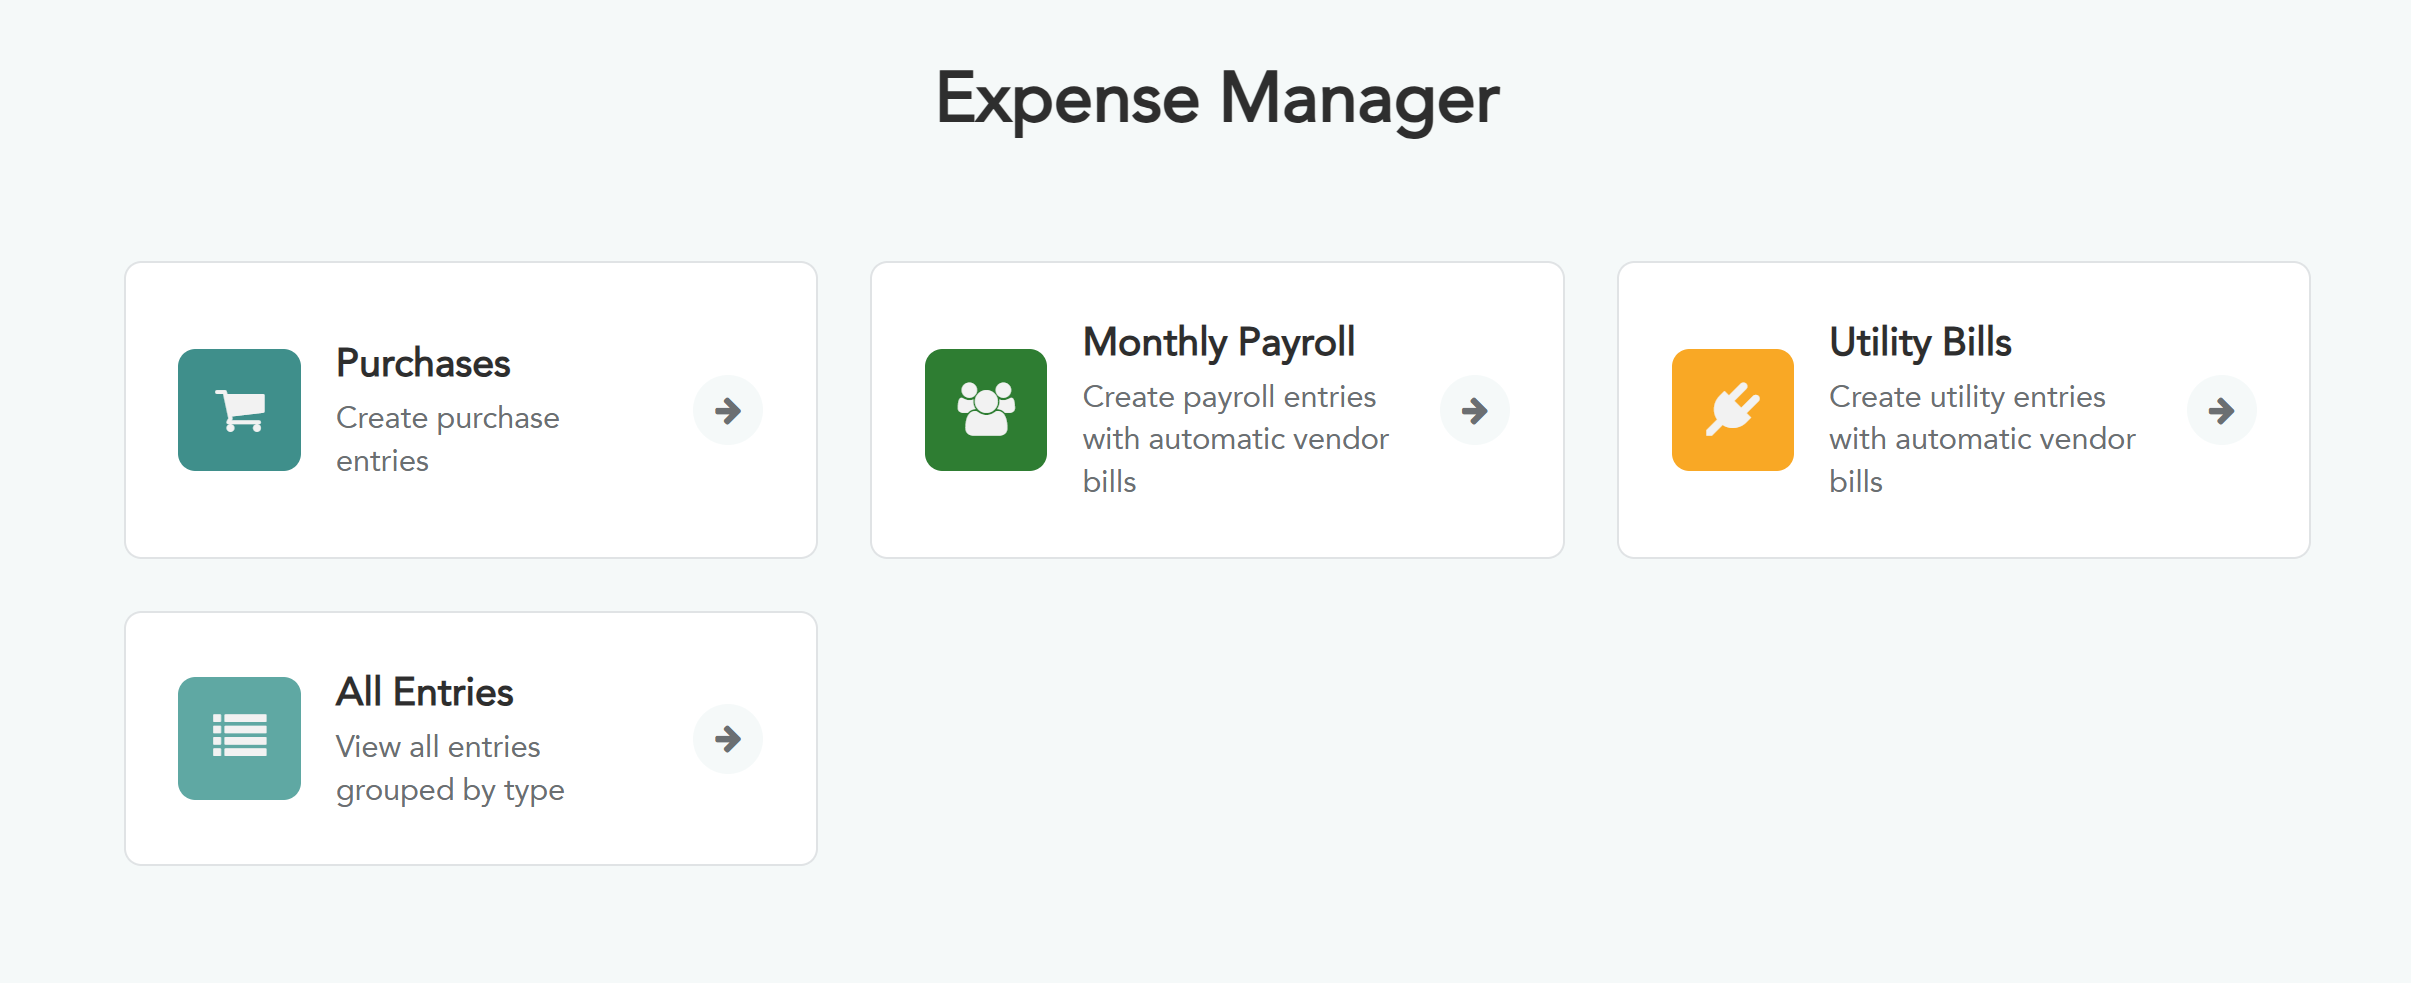
The main dashboard will appear, containing four main sections.
Main sections of the app
Purchases — record expenses for purchasing materials and products.
Monthly Payroll — record employee payroll statements.
Utility Bills — record electricity, water, and other utility bills.
All Entries — a consolidated view of all entries by type.
1. Purchases
This section is used to record purchases of materials and products. It lets you specify the supplier, enter the products along with their quantities and prices, and set the payment method and applicable tax.
Recording a purchase
Click the “New” button. The following window will appear — fill in the fields according to the instructions below:
The following window will appear; fill in the fields according to the instructions below.
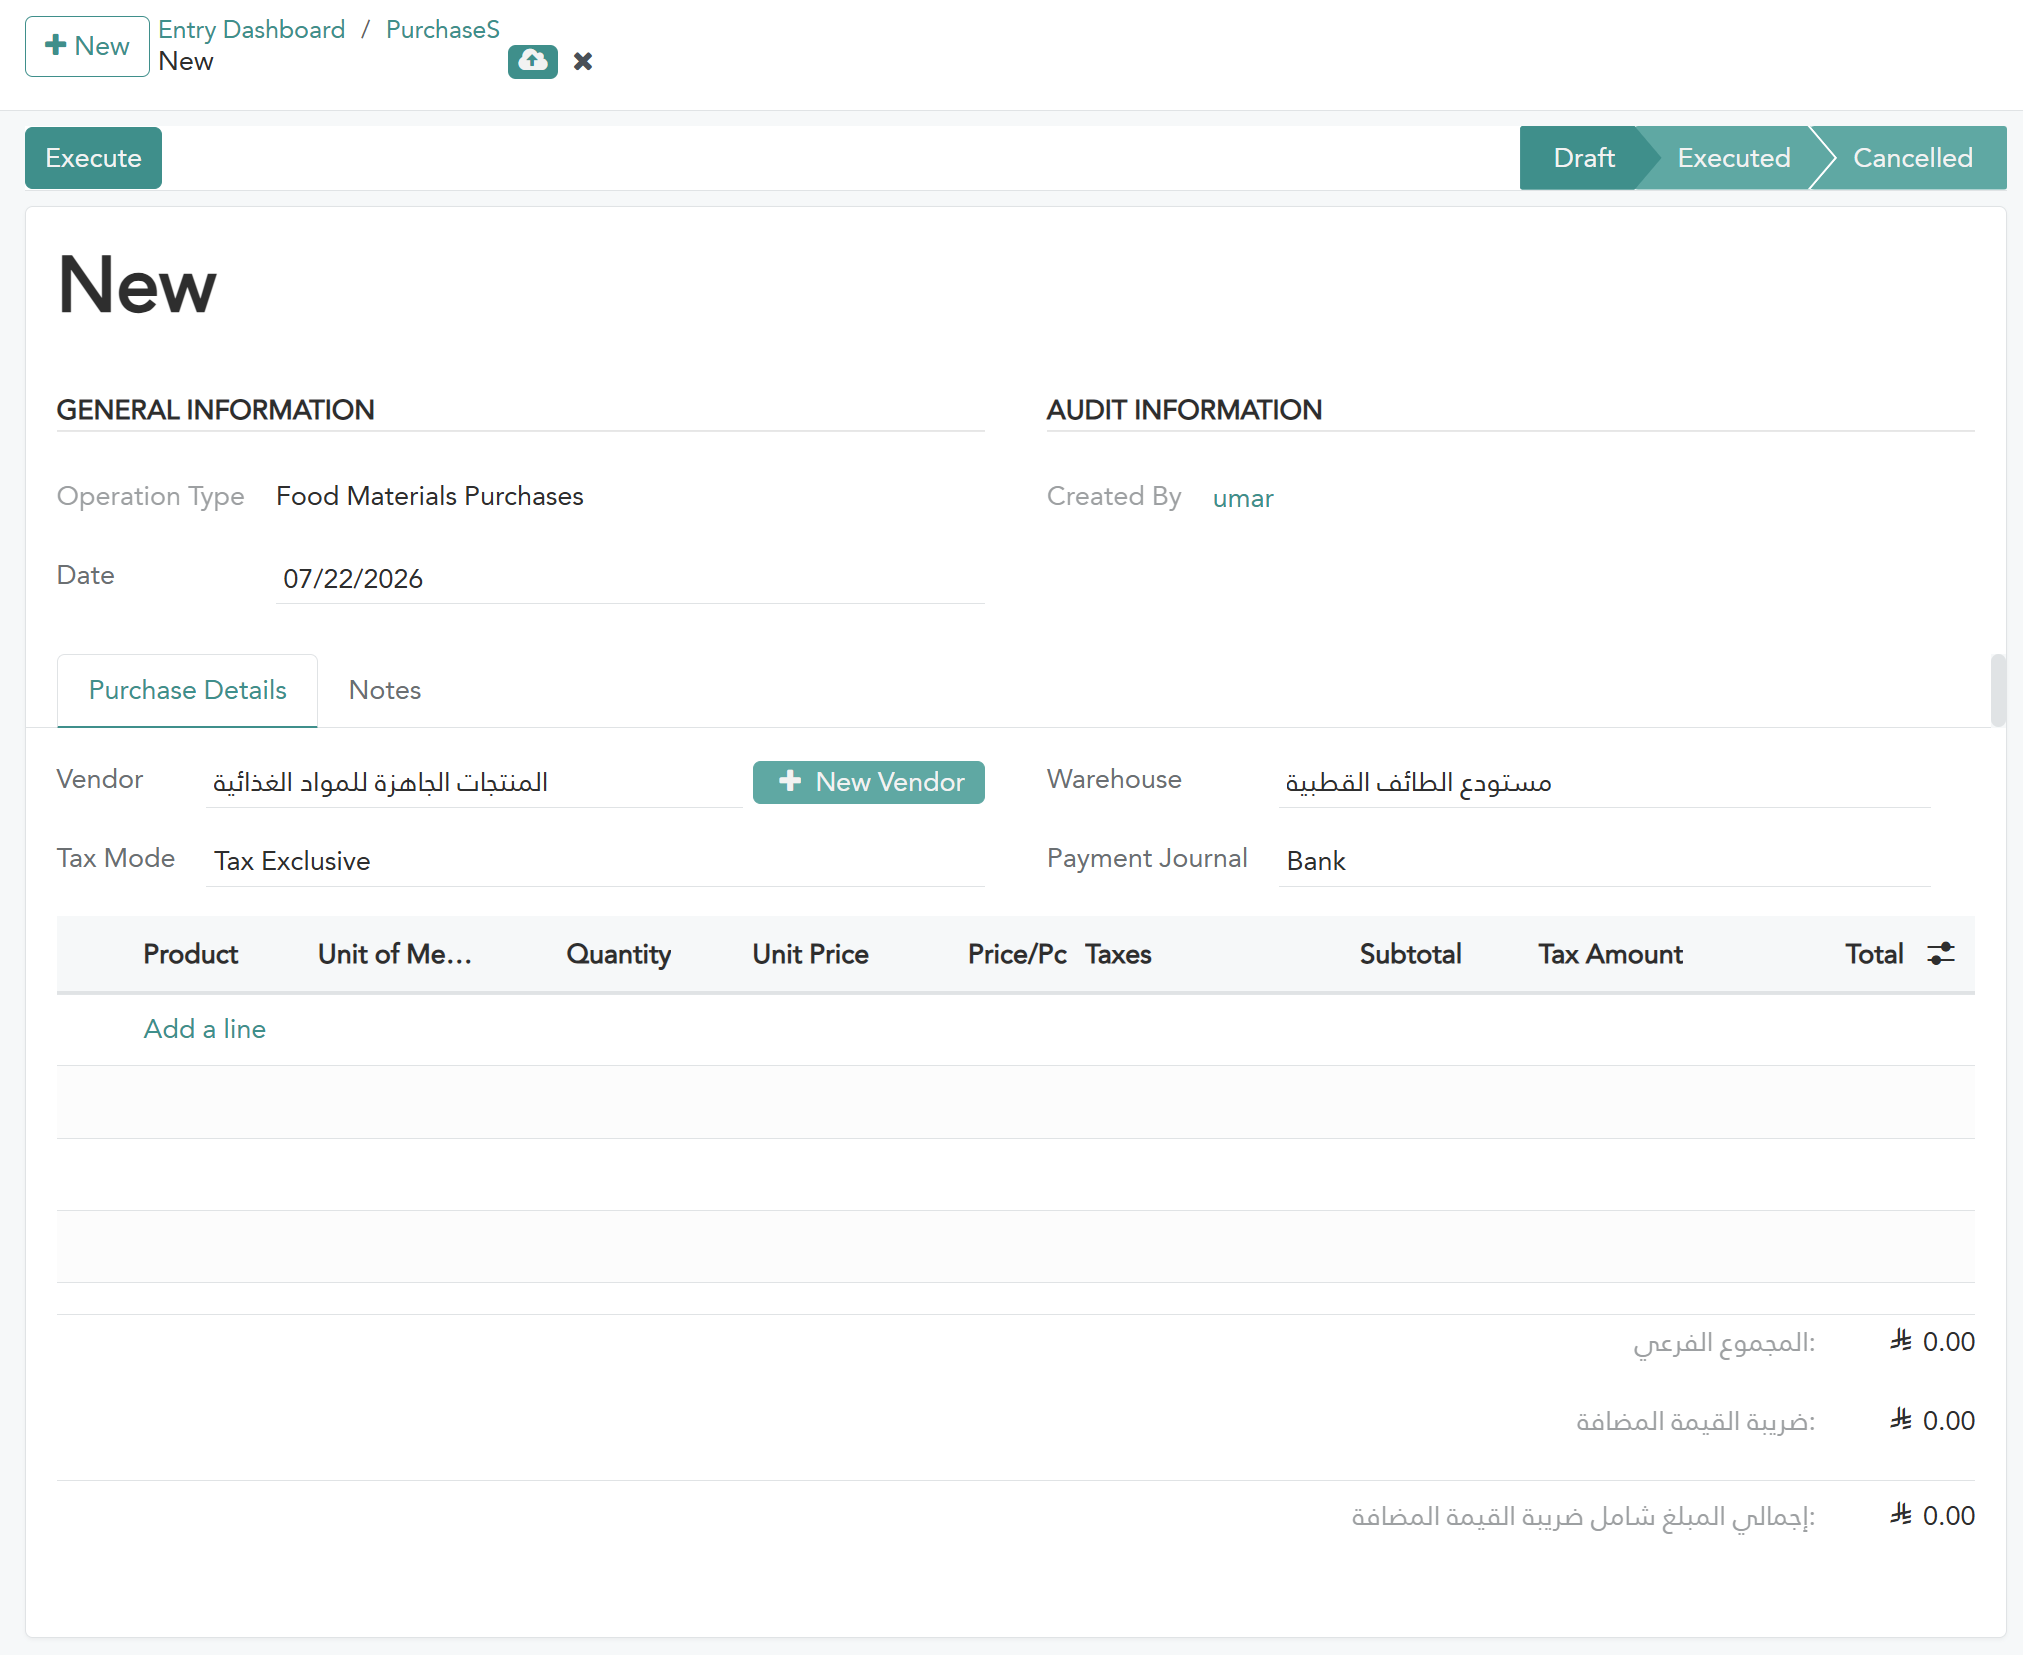
Set the “Date” — the date the purchase was made, or leave it as is to use today’s date.
Set the “Supplier” — the name of the supplier or party the purchase was made from.
Or click “New Vendor” — to add a new supplier.
Set the “Tax Type” — tax-inclusive or tax-exclusive.
Set the “Warehouse” — the warehouse the goods will be sent to.
Set the “Payment Journal” — the payment method used.
Enter the product details in the table: product name — unit of measure — quantity — unit price.
After reviewing the data, click the “Save” button to save it as a draft.
Or the “Execute” button to finalize the entry.
Important notice: No data can be edited after clicking “Execute.” Make sure all fields are correct before executing.
Reviewing a previous entry
From the Purchases page:
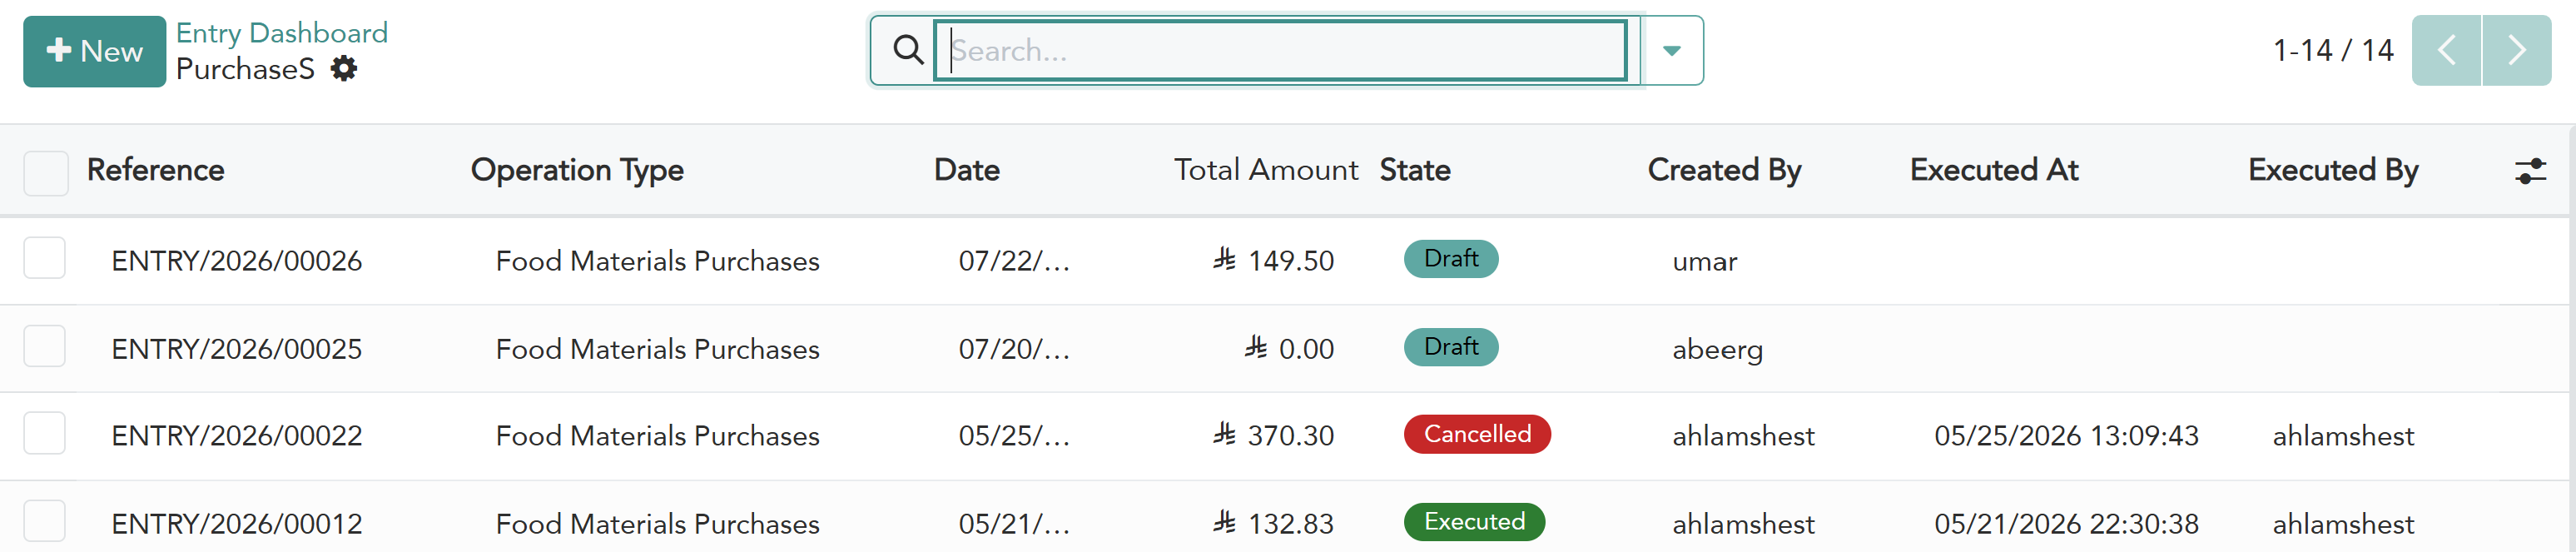
A list of all entries appears: reference number — transaction type — date — total amount — status — entry creator.
Click any row to open the details of that entry.
You can see who created the entry, who executed it, and the execution date at the bottom of the page.
You can search and filter using the list columns (date, status, amount).
2. Monthly Payroll
This section is used to record employee payroll statements on a monthly basis. It lets you enter each employee’s data — basic salary, allowances, and deductions — and automatically calculates the net amount.
Creating a new payroll statement
Click the “New” button. The following window will appear — fill in the fields according to the instructions below:

The following window will appear; fill in the fields according to the instructions below.
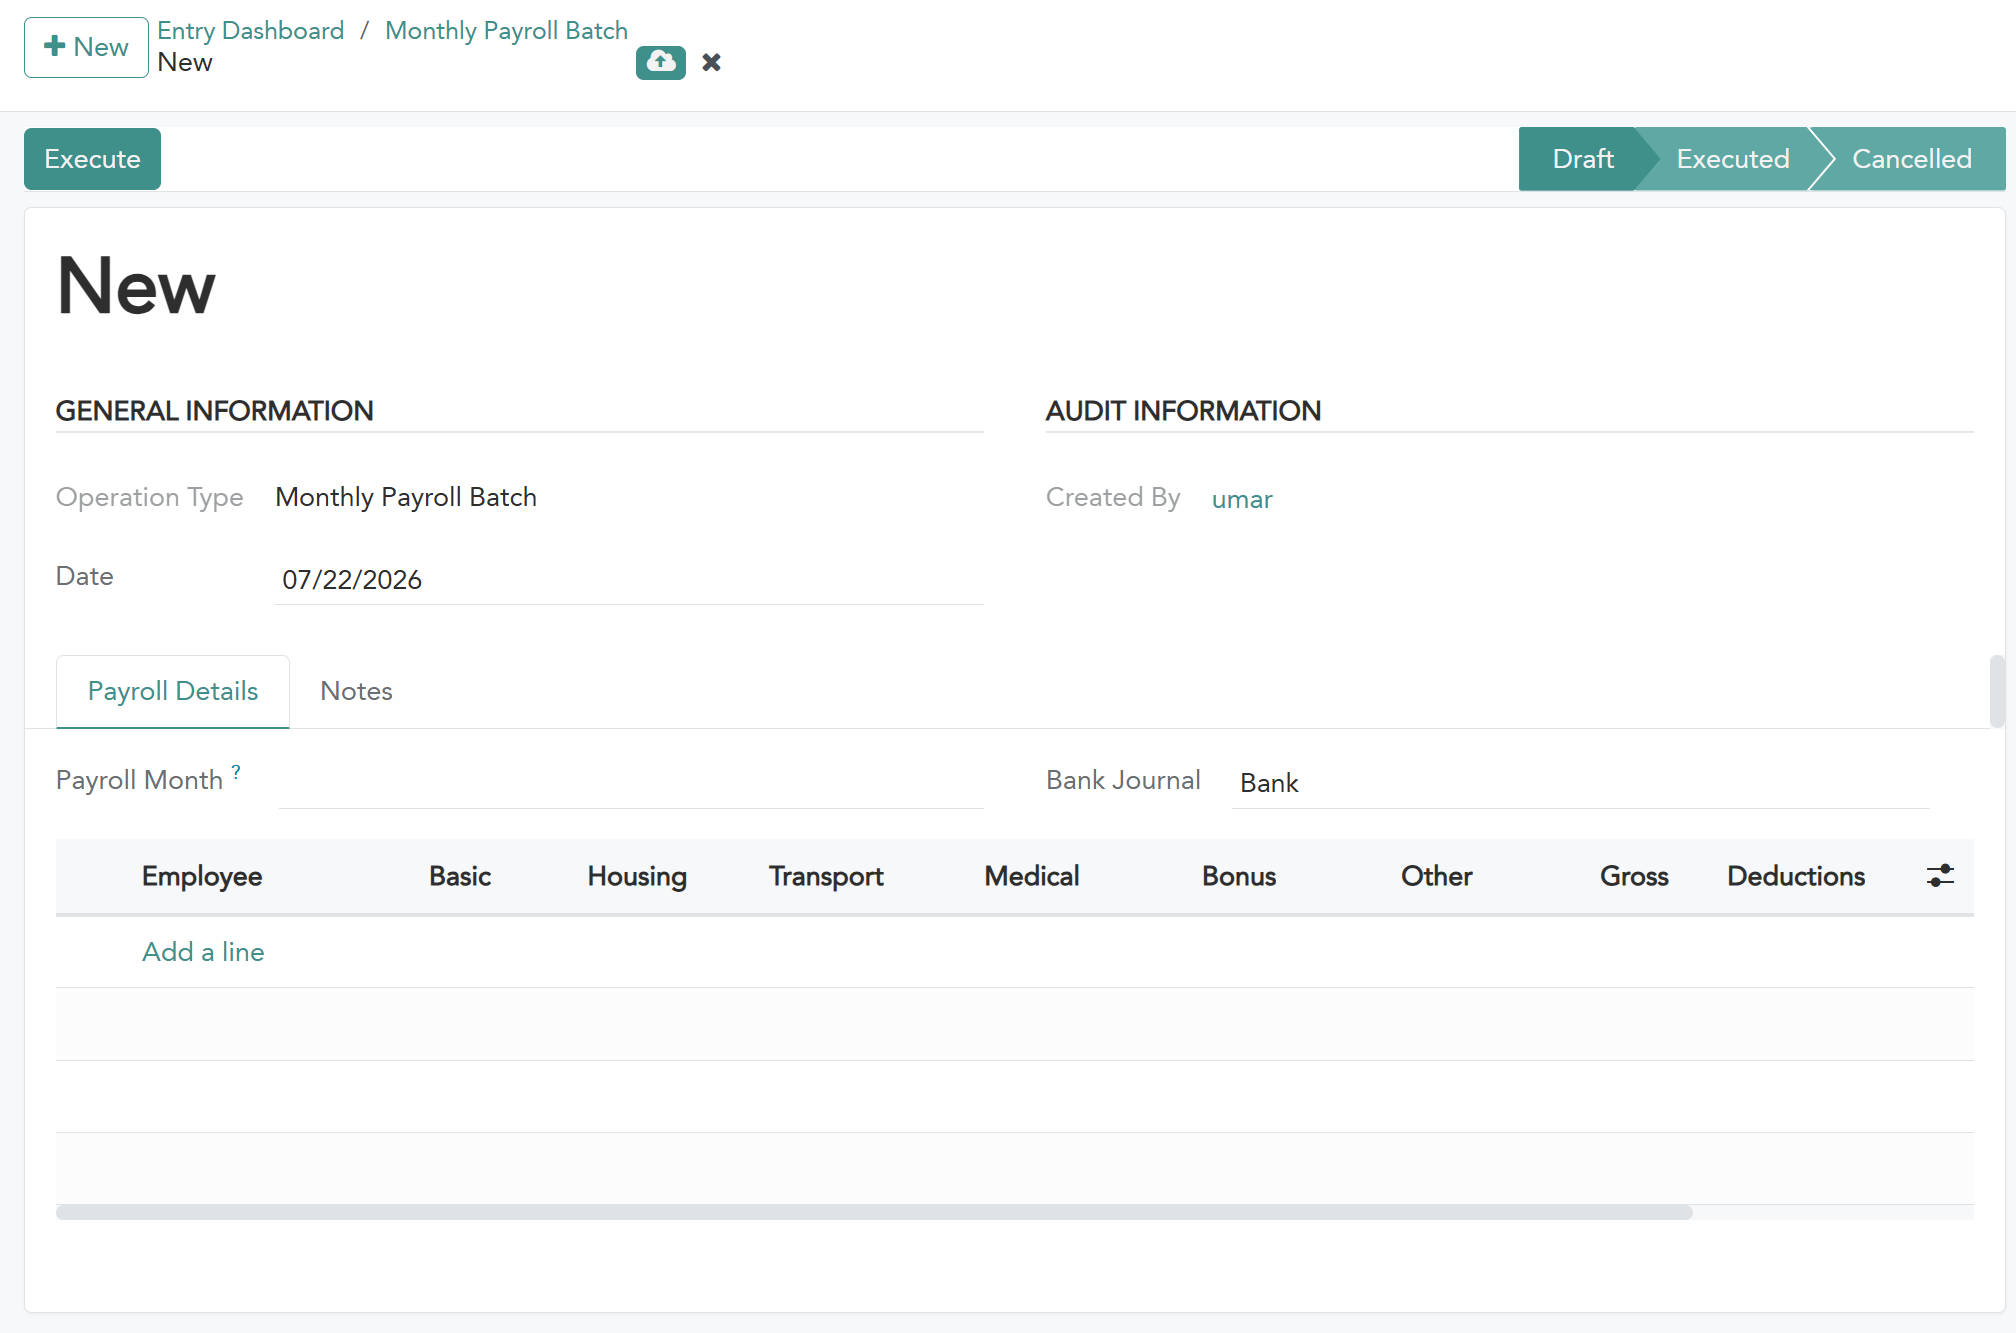
Set the “Date” — the date the payroll is disbursed.
Set the “Payroll Month” — the month this statement covers.
Set the “Accounting Journal” — the journal used to record the payroll disbursement.
Enter each employee’s data in the table: employee name — basic salary — housing allowance — transportation allowance — medical insurance — bonus — deductions. (The system automatically calculates each employee’s net salary after the data is entered.)
You can click the “Notes” tab to add any text notes (optional).
After reviewing the entire statement, click “Save” to save it as a draft.
Or “Execute” to finalize the payroll disbursement.
Important notice: The payroll statement cannot be edited after clicking “Execute.” Make sure all fields are correct before executing.
Reviewing a previous payroll statement
From the Monthly Payroll page:
A list of all payroll statements appears: reference number — date — month — total amount — status — entry creator.
Click any row to open the details of that month’s statement.
You can review each employee’s data: basic salary, allowances, deductions, and net salary.
You can see who created the statement, who executed it, and the execution date at the bottom of the page.
You can print the payroll statement or export it as a PDF from within the details screen.
3. Utility Bills
This section is used to record recurring operating utility bills such as electricity, water, internet, and others. It lets you specify the supplier, service type, amount, and the appropriate tax calculation method.
Creating a new utility bill
Click the “New” button. The following window will appear — fill in the fields according to the instructions below:
The following window will appear; fill in the fields according to the instructions below.
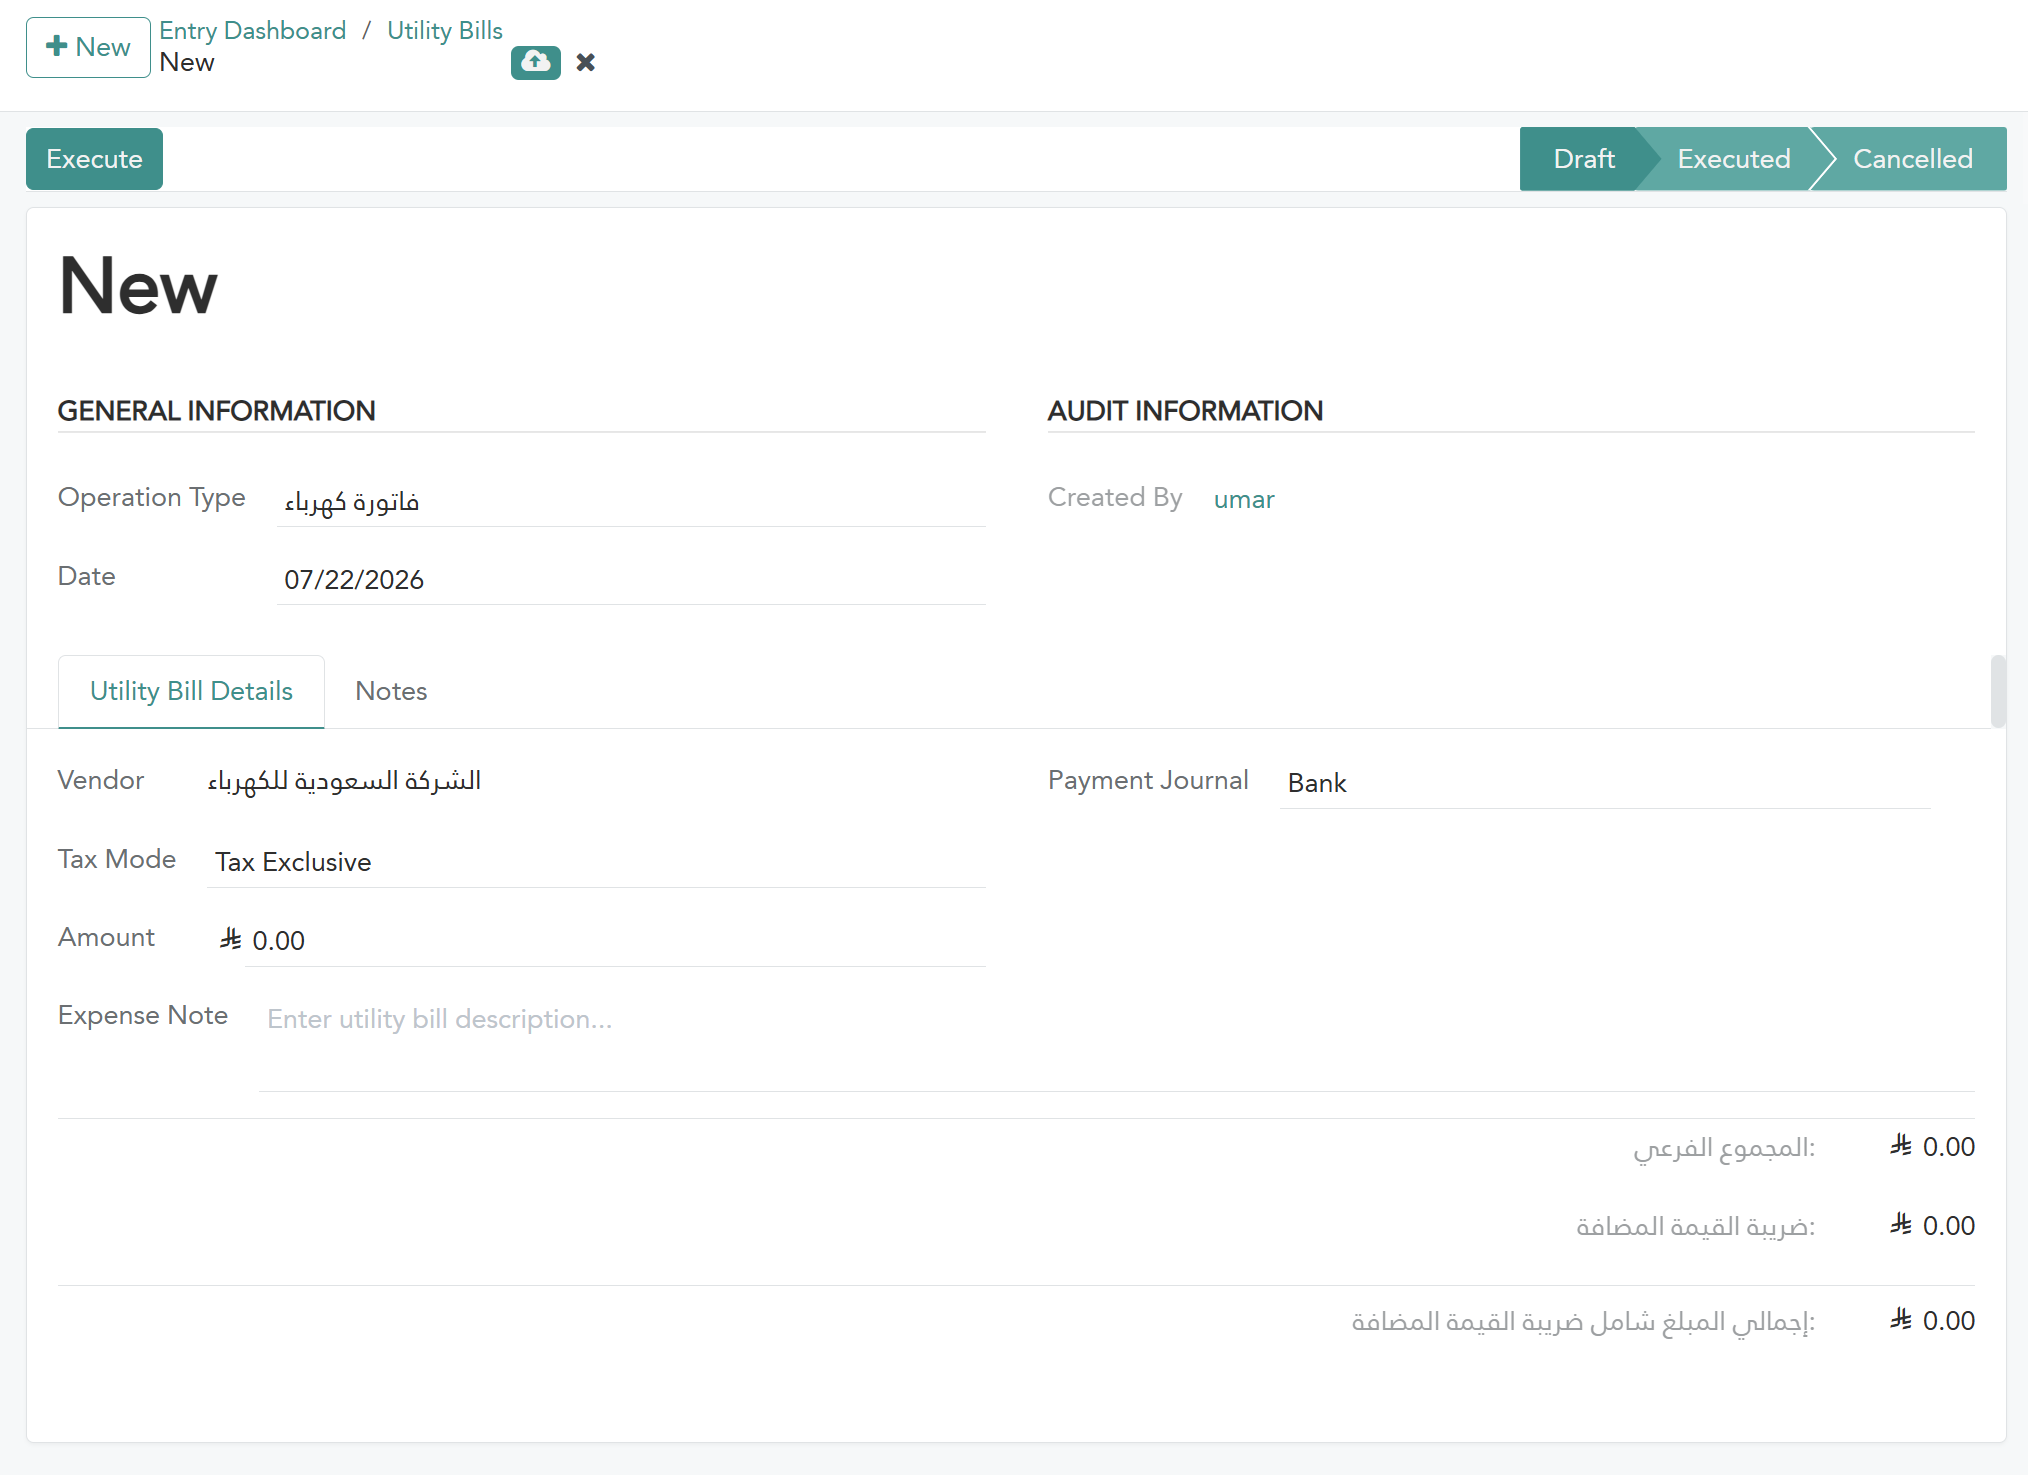
Set the “Transaction Type” — choose the appropriate service type (electricity, water, internet, other).
Set the “Date” — the date the bill was received or paid.
Set the “Supplier” — the name of the service provider (example: Saudi Electricity Company).
Set the “Tax Type” — VAT-inclusive or VAT-exclusive.
Set the “Accounting Journal” — the journal used to record the utility bill transaction.
Set the “Quantity” — this refers to the bill’s value. (The system automatically displays: the subtotal — 15% VAT — the total amount.)
Enter the bill’s description in the “Expense Details” field — service name, bill number, period (optional).
After reviewing, click “Save” to save it as a draft.
Or “Execute” to finalize the bill.
Notice: The utility bill cannot be edited after clicking “Execute.” Make sure the amount and tax type are correct before executing.
If the bill is tax-inclusive, the system will calculate the tax value from within the amount. If it is tax-exclusive, the tax will be added on top of it.
Reviewing a previous bill
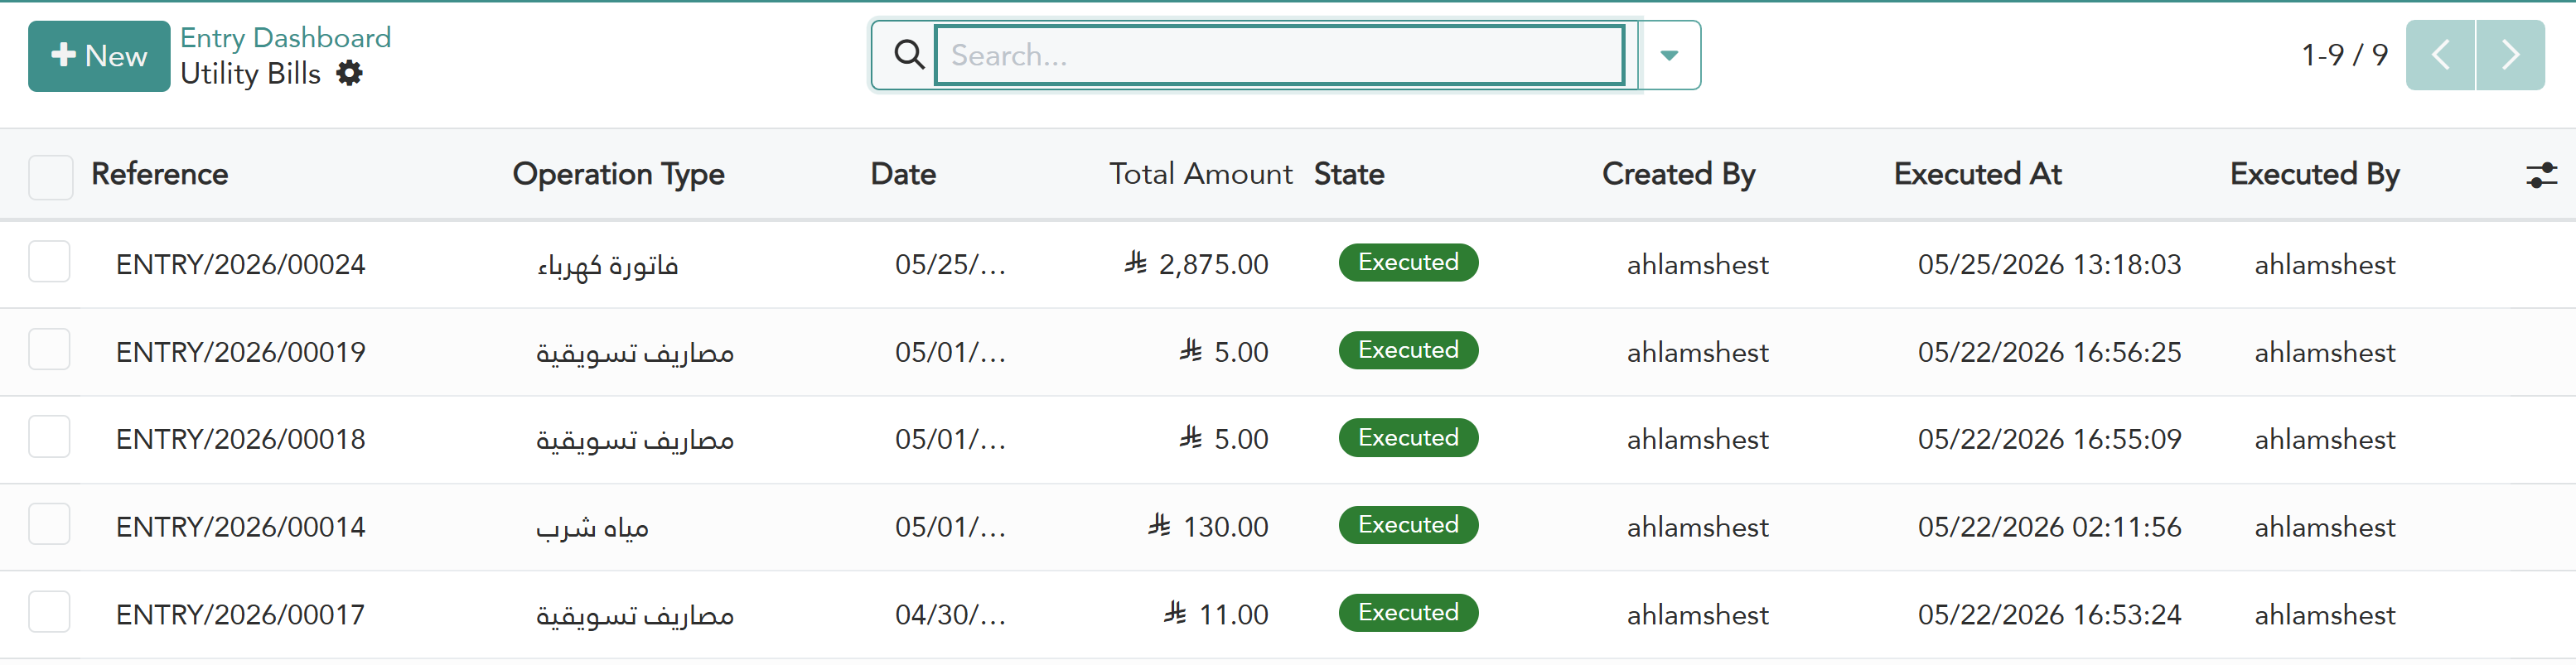
From the Utility Bills page:
A list of all bills appears: reference number — service type — date — total amount — status — entry creator.
Click any row to open the details of that bill.
You can review: the service description, subtotal amount, tax value, and total amount.
You can see who created the bill, who executed it, and the execution date at the bottom of the page.
You can search and filter by service type, date, or status.
You can print any bill or export it as a PDF from within the details screen.