

POS Categories
Categories are how products are arranged in front of the cashier. Instead of one long list, the cashier finds products spread across clear categories, reaching an item in two taps.
Browsing categories
Categories are shown as cards, with their place in the hierarchy underneath:
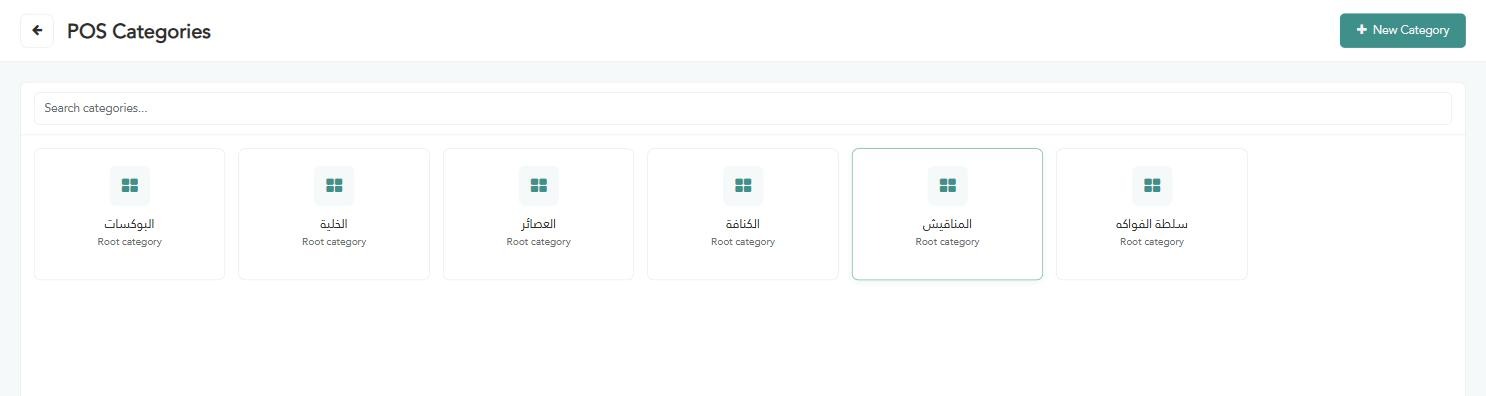
Category name — as it appears in the cashier app.
Root category — means the category is top level and does not sit under another.
Search field — to reach a category quickly by name.
Creating a new category
Click “New category”. The following window appears; fill in the fields according to the instructions below:
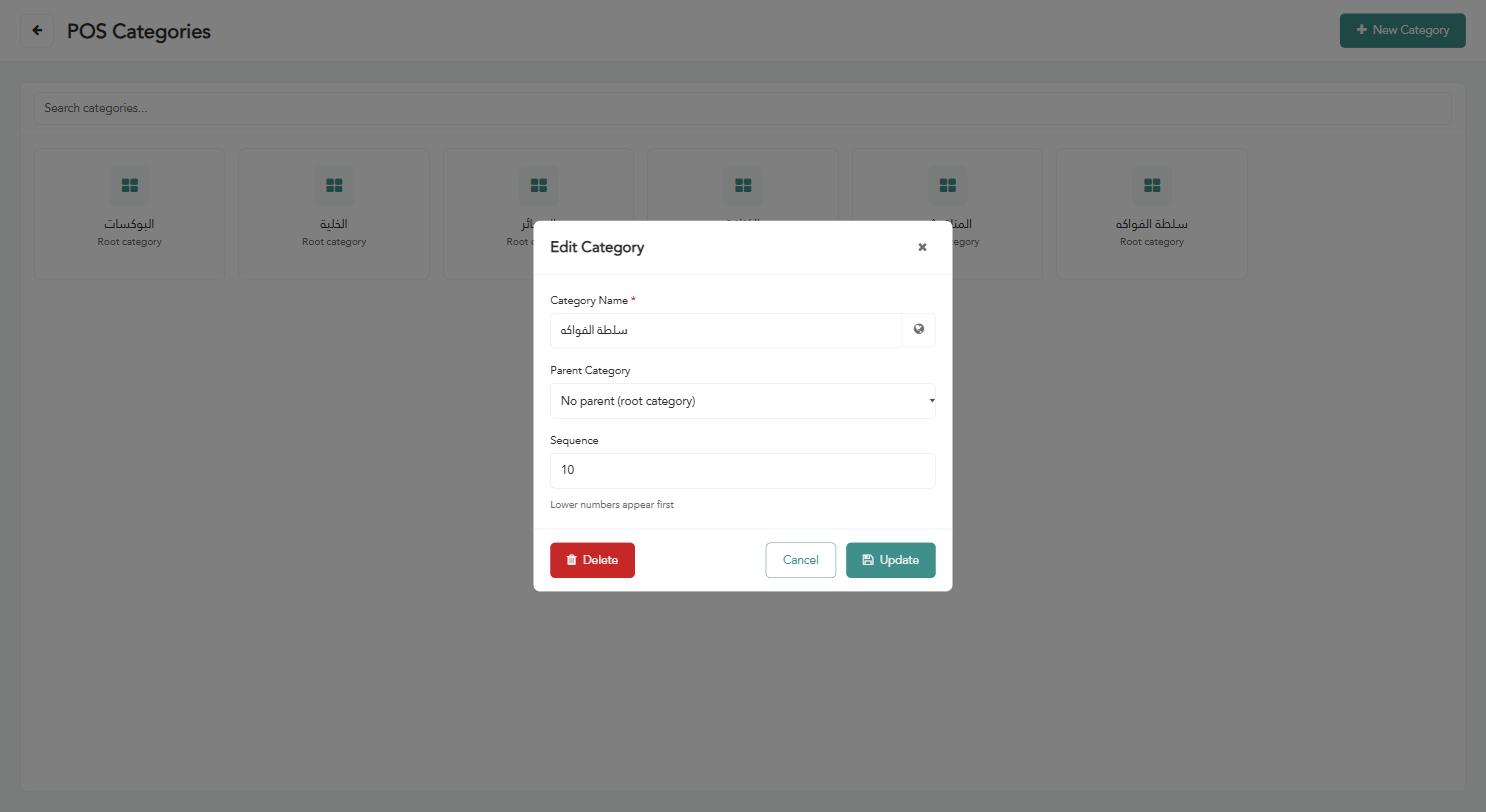
“Category name” (required) — the name shown to the cashier.
The translation button beside the name — to enter the category name in another language.
“Parent category” — leave it as “No parent (root category)” for a main category, or pick a category to make this one a subcategory of it.
“Sequence” — a number setting the display order; lower numbers appear first.
Click “Create” to save the category.
Give your best-selling categories low sequence numbers so they appear at the front of the screen — this saves the cashier time at peak hours.
Editing or deleting a category
Click the category card to open the edit window.
Change the name, parent category or sequence, then click “Update”.
The red “Delete” button removes the category.
Warning: Before deleting a category, move its products to another one — otherwise they may disappear from the cashier screen even though they remain in Products.